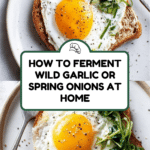
Fermented Wild Garlic or Spring Onions Recipe
Introduction
Fermented wild garlic or spring onions offer a tangy, vibrant twist to your meals, packed with beneficial probiotics. This simple fermentation process transforms fresh greens into a flavorful condiment perfect for sandwiches, salads, and more.

Ingredients
- 600g fresh wild garlic or spring onions
- Pinch of demerara sugar
- 1½ tsp sea salt
- Still mineral water, to top up
Instructions
- Step 1: Sterilise your jars thoroughly before starting the fermentation process.
- Step 2: Wash the wild garlic or spring onions well, then dry them using a clean tea towel or salad spinner.
- Step 3: Finely shred the greens with a knife. Layer them in a bowl, sprinkling a pinch of demerara sugar and sea salt on each layer until all the vegetables are used.
- Step 4: Let the mixture stand for about 30 minutes to begin drawing out moisture.
- Step 5: Massage the greens with the salt and sugar mixture until they turn a darker green and start to lose shape. Leave to rest for another 30 minutes.
- Step 6: Pack the greens tightly into the sterilised jar, using a tool like the end of a rolling pin to press out any air bubbles.
- Step 7: Add still mineral water to ensure the vegetables are fully submerged. Then, crumple baking parchment and press it firmly into the jar to weigh down the greens and keep them under the brine.
- Step 8: Cover the jar with clean muslin and secure with a rubber band. Leave it in a cool, dark place for 4 to 7 days, depending on your preferred level of fermentation.
- Step 9: Check the jar daily to ‘burp’ it by loosening the cover briefly to release gases, then replace it.
- Step 10: When the taste is to your liking, remove the parchment and muslin, seal the jar with a lid, and refrigerate to slow fermentation.
Tips & Variations
- Use a fermentation weight or a small clean jar inside the main jar to keep the greens submerged if you don’t have baking parchment.
- Experiment with adding a few peppercorns or mustard seeds for a different flavor twist.
- If wild garlic isn’t available, spring onions work just as well.
Storage
Store your fermented wild garlic or spring onions in the refrigerator once sealed. They will keep for several months, maintaining their flavor and probiotic benefits. Use clean utensils to avoid contamination, and avoid leaving them at room temperature after refrigeration.
How to Serve

Serve this delicious recipe with your favorite sides.
FAQs
How do I know when the fermentation is done?
The fermentation time varies but usually takes 4 to 7 days. Taste your ferment daily after the fourth day; it’s ready when it has a pleasantly tangy, slightly sour flavor without any off smells.
Can I speed up the fermentation process?
Fermentation depends on temperature and bacterial activity. Keeping the jar in a warmer spot (around 20-22°C) can speed it up, but be cautious as too warm conditions can encourage unwanted bacteria. Patience yields the best flavor and texture.
Print
Fermented Wild Garlic or Spring Onions Recipe
- Total Time: 4 to 7 days (fermentation time)
- Yield: Approximately 1 jar (about 600g fermented wild garlic or spring onions) 1x
- Diet: Vegetarian
Description
A simple and traditional recipe for fermented wild garlic or spring onions that captures the vibrant, tangy flavors of homemade fermented greens. This easy fermentation process uses natural fermentation to preserve and enhance the fresh, garlicky taste of wild garlic or the mild bite of spring onions, resulting in a probiotic-rich condiment perfect for adding zest to various dishes.
Ingredients
Fermentation Ingredients
- 600g fresh wild garlic or spring onions
- Pinch of demerara sugar
- 1½ tsp sea salt
- Still mineral water, to top up
Instructions
- Sterilize Jars: Begin by thoroughly sterilizing your fermentation jars to prevent unwanted bacteria from spoiling the ferment.
- Prepare Vegetables: Wash the wild garlic or spring onions thoroughly and dry using a clean tea towel or a salad spinner. Shred finely with a knife.
- Layer with Sugar and Salt: Place a layer of shredded garlic or onions in a bowl, sprinkle some demerara sugar and sea salt over it. Repeat layering with the rest of the vegetables and sugar and salt, then leave to stand for about 30 minutes to start drawing out moisture.
- Massage the Vegetables: Massage the layers with the salt and juice until the garlic or onions darken and lose their firm shape; this should take another 30 minutes.
- Pack the Jar: Transfer the massaged vegetables into your sterilized jar, pressing down firmly with a clean rolling pin or similar tool to eliminate air bubbles and compact the vegetables.
- Check Brine Level: Ensure the vegetables are covered with their own juice, adding still mineral water if necessary to submerge them completely.
- Weigh Down the Vegetables: Crumple a piece of baking parchment and firmly place it on top of the vegetables to keep them submerged under the brine.
- Cover and Ferment: Cover the jar with clean muslin secured with a rubber band. Place the jar on a cool, dark shelf and allow it to ferment for 4 to 7 days, depending on taste preference. Check daily to ‘burp’ the jar, removing the cover briefly to release gas buildup.
- Seal and Store: Once the fermentation reaches your desired tanginess, remove the parchment and muslin, seal the jar with a lid, and store it in the refrigerator, where it will keep for months.
Notes
- Ensure your jars and utensils are thoroughly sterilized to prevent contamination and spoilage.
- The fermentation period can be adjusted from 4 to 7 days depending on how strong and tangy you want the flavor.
- Keep the vegetables fully submerged in brine at all times to avoid mold growth.
- Use still mineral water to avoid introducing chlorine or chloramines that could hinder fermentation.
- This ferment works well as a tangy addition to sandwiches, salads, or as a condiment alongside meats and cheeses.
- Prep Time: 15 minutes
- Cook Time: 0 minutes
- Category: Condiments
- Method: No-Cook
- Cuisine: European
Keywords: fermented wild garlic, fermented spring onions, wild garlic ferment, spring onion ferment, probiotic condiment, homemade fermentation


